Tuesday, January 3, 2012

Tuesday, January 3, 2012

Well, the holidays are over.  I didn't make as much progress as I'd have liked, since the last entry.  I have made some, though.  I've continued doing filler/sanding work.  The front valance is still a challenge, to get the curve just right, and I will give it some more attention this weekend, when it is warmer.

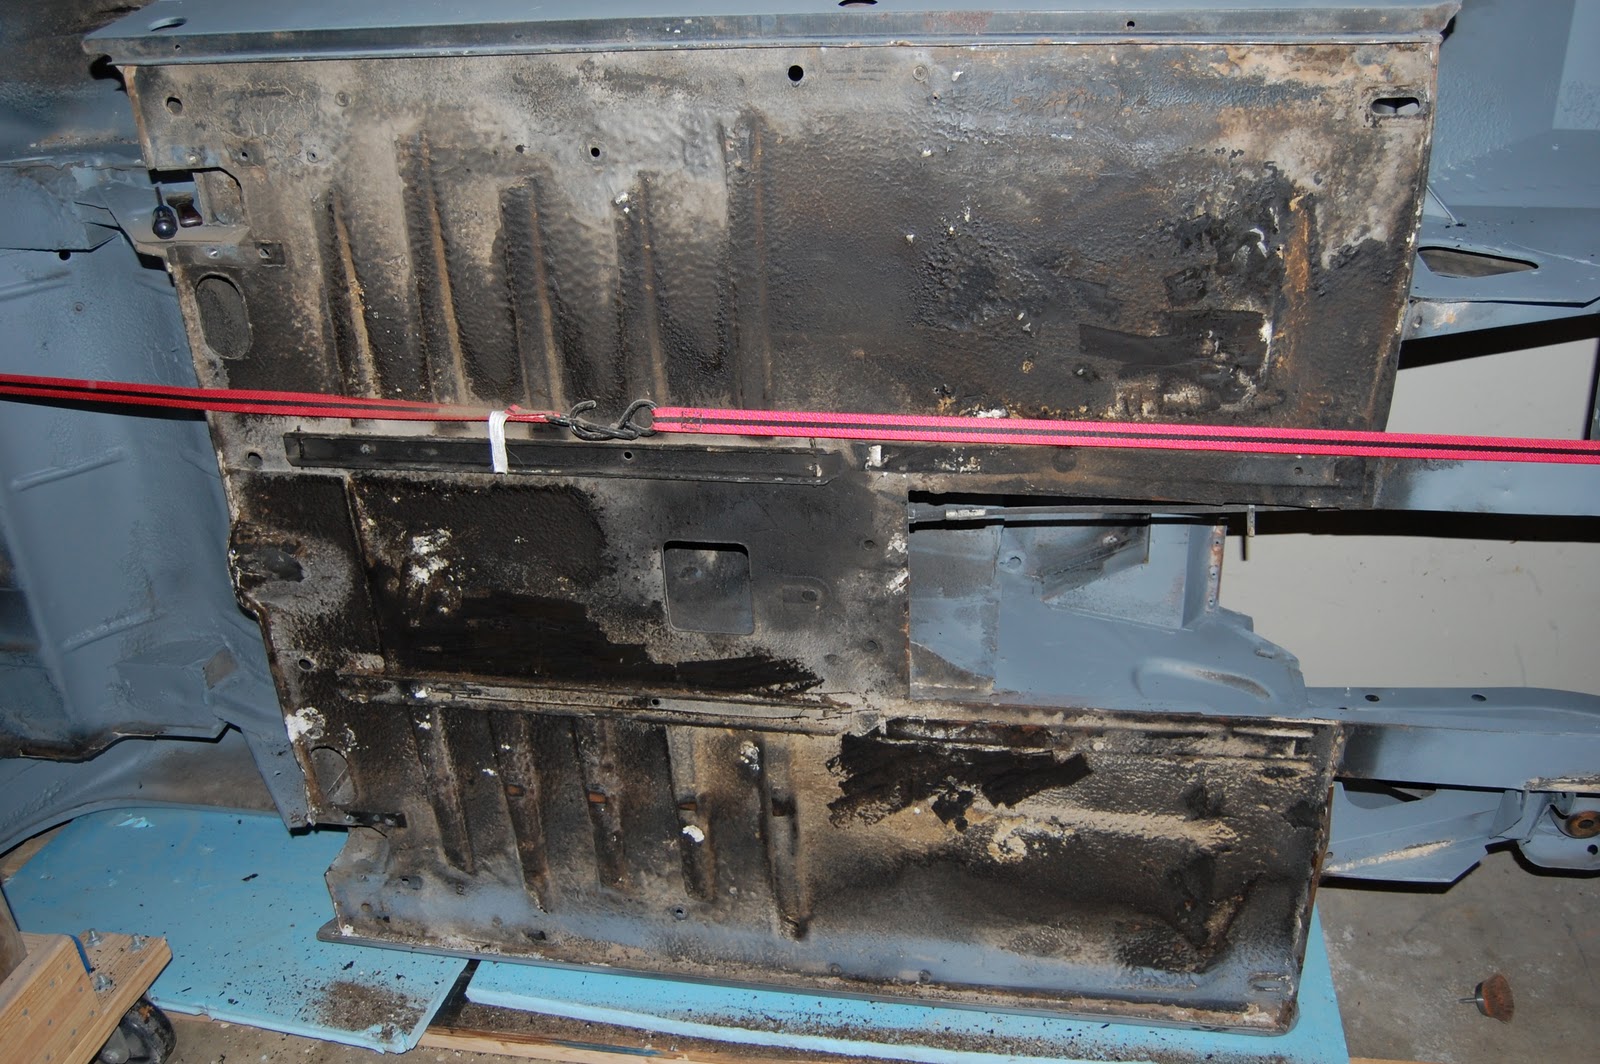
Here are a couple of pictures of my Midget's battery tray.  it is pockmarked with some surface rust, but I am going to sand and skim-coat with a bit of 'dolphin' filler.  It's good for thin coats, and will make this look nice.  I have one rusted spot in the corner, which I cut out with my BOSCH multi-tool.  My pneumatic cut-off tool wouldn't fit in the space, but this worked nicely.

I've found this tool to be super-handy in several situations, but had never considered the Midget, until presented with the close quarters of the battery tray.  Control was pretty good, though it does tend to jump on you, and needs a firm hand, so as to not gouge further than you need to.  I have found that light pressure allows the vibration to do its thing.

Here is the cut-out.  You can see that I was trying to preserve the drain hole in the corner, but it is pretty far gone, and just makes the welding more difficult, so i'm going to nip it out of there, and just re-drill the hole in a new patch.  I'm sourcing the patch(es) from a piece of the old front valance, which still has a lot of good steel in it.  Alternatively, I would get it from the old gas tank.  I may have to have my 21-yr-old weld this in for me though.  His eyesight is better!

Sunday, December 11, 2011

Sunday, December 11, 2011

Yesterday, made good progress on a number of things:

- painted POR-15 in the inner bottom of the doors.  Driver's door, which is original, had quite a bit of rust, so this will stop it.

- continued sanding/filling/sanding door panels, and am pretty much done on that front.  Will go back and re-check today.

- started filling/sanding dents in front valance.  I put on a new valance, but when clamping it for the panel adhesive to bond, dented the front.  So am filling that and am probably 75% done.

- to cover (even temporarily) all of the bodywork, I activated a can of 2K epoxy primer (spray-on).  'Pot life' is 4 days, so I'm going to try and make the most of that $19 can of primer.

- dinged some dents out of the passenger front fender (from dropping it on the concrete).  They came out pretty easily, and now just need a skim coat of filler.

Monday, December 5, 2011

Monday, December 5, 2011

A good weekend of welding and body filler.  Welded up the multiple holes in the doors from various mirror mountings.  I plan to go back with stock chrome mirrors (which I already have), after the car is painted.  Reckon I'll drill them then.  Though, I suppose, I should drill them while still in primer, so as to not leave a bare metal edge to rust.
A quick stop by Harbor Freight on Friday night, and I had new welding gloves and a solar-powered, auto-dimming welding helmet. (see pic)  I also bought some ear protection, as my air compressor is really LOUD.

Locating my cut-off tool (for grinding the welds) was problematic, but after some accusatory emails to some friends, to whom I thought I had loaned it, I remembered where it probably was, and, indeed, it was there!


Welding with non-shielded, flux-core wire is a little messier than MIG, but I got the hang of it, and the spatter comes off pretty easily with some 60 grit paper.


Doors are now skim-coated, sanded and primed.  I most likely will go back over them again.  I also am going to apply POR-15 to the inside bottom of the doors, as they tend to rust, and the driver's door is already showing some corrosion. 


I also did a little work on the driver's rocker....


Saturday, November 26, 2011

Saturday, November 26, 2011

Yesterday, my brother and I started the final bodywork, pre-paint.  Mostly, he showed me 'bondo' technique,  proper sanding methods, and how to prime the car body.  Here are some pics...
driver's door pillar devoid of primer
first coat

with filler, after sanding
small dent near back-up light

welded-up pinhole where dealer plate was


dent at trunk

repair of trunk dent


trunk after filler, before full prime

more trunk.  green is from glazing putty

passenger door and pillar

close-up
pass door after sanding

here i pinged a 'proud' dent and filled

Friday, July 1, 2011

Work has slowed - but still making progress


The last couple of work sessions have been dedicated to scraping the old undercoating off of the bottom of the car.  With the help of some friends, this was accomplished with putty knives, scrapers, naptha, a cordless multi-tool, and hours of elbow grease.  The bottom of the car is in fine shape, with only some dents to contend with.  The bottom is relatively clean now.

Next step is to re-coat the bottom with new undercoating, then prep for painting....

Monday, November 29, 2010

Bodywork Progress #4 - 11/29/10

Car is safely back in the home garage.  Ended up having the fender repaired by the local Brit car shop.  $75 and it looks perfect. 
Note the trangular patch
that was welded in. 

Here are some pics of the car, on its side in my garage, strapped in so that I can clean the underside.


Thursday, November 18, 2010

Bodywork Progress #3 - 11/18/10

Update -

The Midget is now safely ensconced in my garage for the holidays.  Vo-tech semester is almost over, so I brought it home to continue work.  Dropped damaged fender off at McLeod's British Cars, where he will repair the poor welding I did - $75. 

Once that's repaired, it's on to cleaning the underside of the car.  Prime and undercoat.